Recently, I’ve been working on refactoring the infrastructure I host. In addition to migrating from an almost painful amount of questionably managed Docker containers to a reasonably clean docker-compose.yml, this also involved trying to centralize the authentication flow for a handful of various apps.
After configuring authentik and successfully hooking it into openresty, I figured it would be pretty nifty if I could use this to handle single sign-on for WordPress too; this article goes over the process on both the authentik and WordPress sides of the setup. For readers with a different SSO solution, the process should be very similar, with the only real difference being setting up an OAuth2/OIDC flow through your preferred SSO vendor.
Authentik’s documentation includes an article on integration with WordPress which initially seemed very good. Unfortunately, their recommended solution is incompatible with a stock wordpress:php8.0-fpm-alpine container and, based on the time since last commit, it doesn’t look like that will change any time soon. Instead, I had to find an alternative solution: OAuth Single Sign On by miniOrange. While I’m not particularly fond of the limits on the free version of this plugin, nor am I a big fan of their paid tier starting off in the three-digit range, I’ve gotta admit: it works well enough and does (the bare minimum of) what I need it to do.
Configuring authentik
Conveniently, swapping away from authentik’s recommended OAuth2 plugin did not require changing much on that end. The only change I needed to make from their integration guide was to set the Redirect URI to the site’s homepage instead of a specific /wp-admin location — miniOrange’s OAuth plugin forces the homepage as the redirect target on their free version, although the option to shell out some cash is there if you really want redirected straight to the WordPress Dashboard.

Configuring WordPress
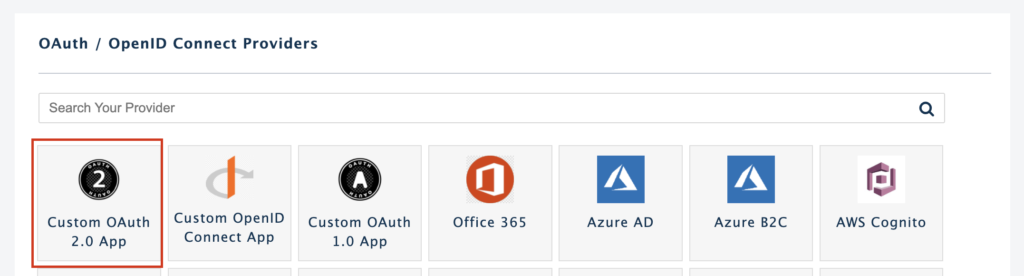
The miniOrange OAuth plugin makes configuring the WordPress side of things very simple, with a pretty easy to follow wizard. After enabling the plugin, it’s essentially just follow the prompts after choosing the OAuth provider, in this case Custom OAuth 2.0 App.
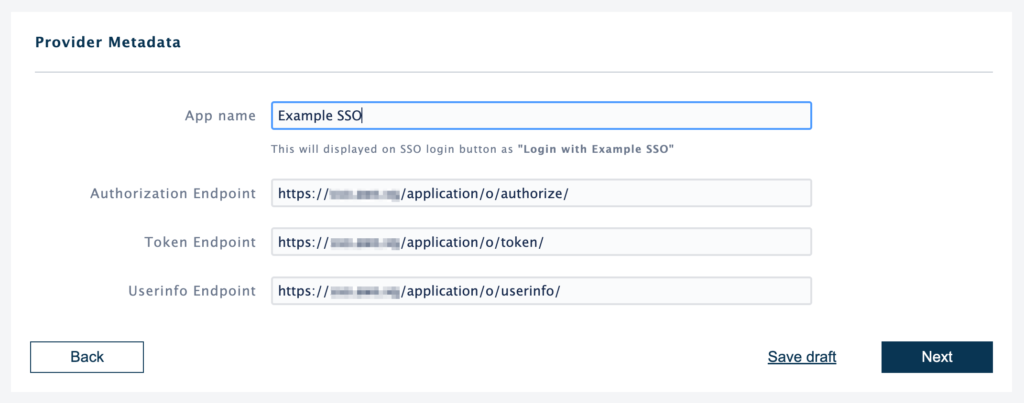
After selecting the type of provider, the OAuth plugin will ask for some data on how to hook to the provider — these endpoints are all listed in authentik’s integration guide, and will vary based on exactly what SSO provider you’re using, but any OAuth provider should provide you with endpoints for authorization, token retrieval and userinfo retrieval.
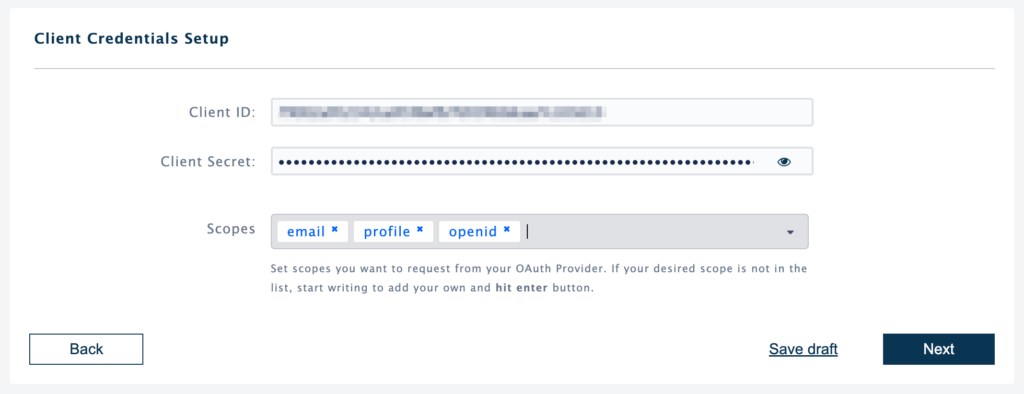
Last step is to specify the credentials and scopes. The Client ID and Client Secret are both provided during the Provider setup in authentik, and the scopes used are the same as what authentik’s integration guide recommends — email, profile, and openid.
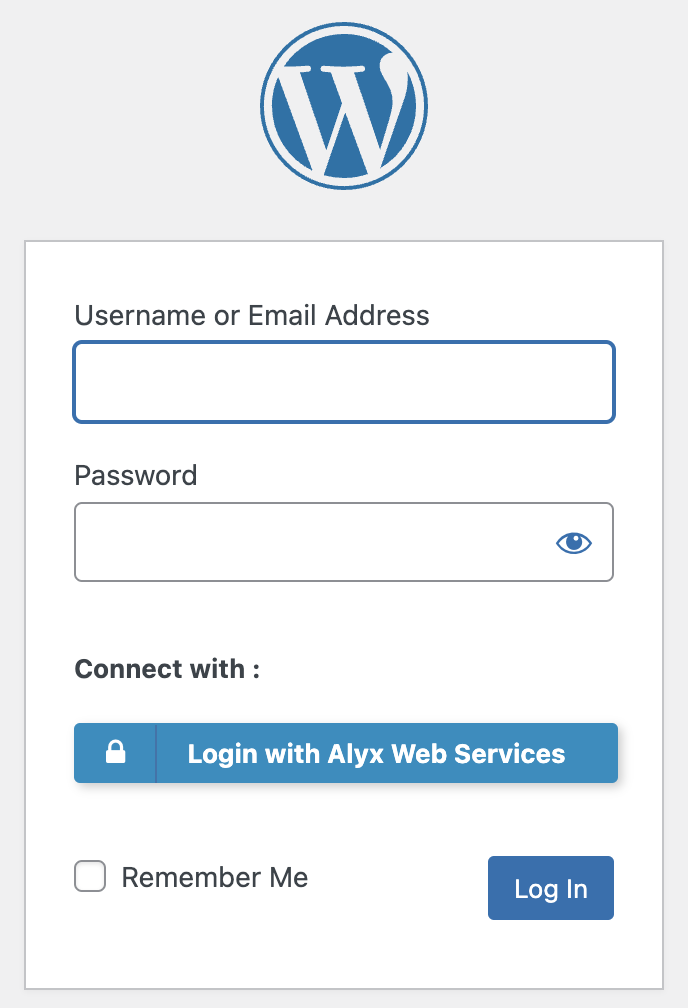
Once you’ve entered the required credentials, the final step is just the OAuth plugin running a test to confirm integration is successful. Assuming that works out correctly (which, in my pretty basic testing, 2/2 sites integrated with authentik’s OAuth worked flawlessly), you can now sign into /wp-admin using your SSO credentials.
Leave a Reply